

Design Guide
FireSprint Design Guide
Browse design rules, examples, and assets. Use the menu to jump between sections and sub-sections.
File Requirements
What we need for your design.
Design Programs
- Adobe Illustrator is our most highly recommended design program, and is one of the most powerful design tools available.
- Other programs that can export vector pdfs can be used, such as CorelDraw or Affinity. These programs may have some limitations on layer naming and design tools.
- Programs such as Canva (web) and Photoshop should not be used for anything other than basic rectangular designs, intended to be cut as a rectangle. Canva does not have good tools for creating custom vector cut paths. Photoshop cannot export vector objects.
File Type
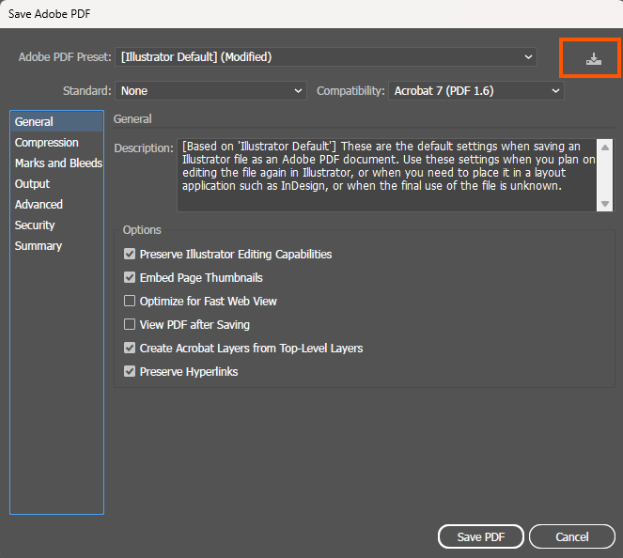
FireSprint only accepts PDF files no larger than 150mb each. For layered files, choose Adobe 7 (or higher) compatibility when saving your PDF. FireSprint does not utilize or work with .jpg, .png, .ai, .psd, .tiff or any other file formats.
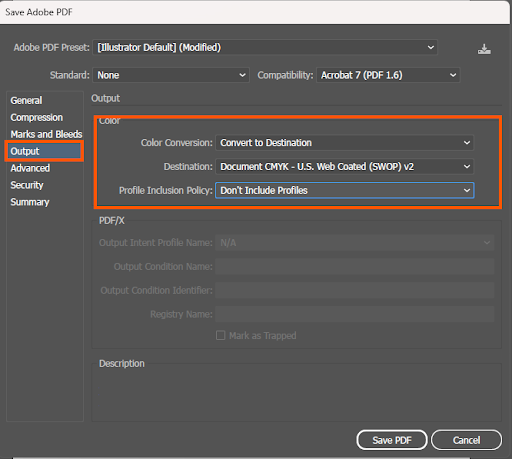
Color Space
It is highly recommended to convert all colors to a CMYK color space prior to submitting your file. While RGB, sRGB, and other color profiles may be used, it can result in a vastly different print vs screen color. Display vs print CMYK color cannot be guaranteed to match, but results tend to be closer in relation to each other.
Art Sizing Guide (Requirements)
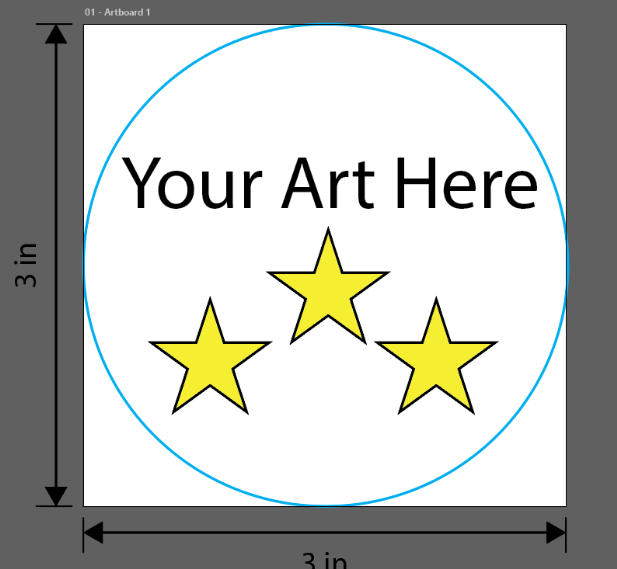
The artboard or sheet size should match the desired dimensions on the order. For example, if ordering a 3” x 3” square sticker, the artboard should be sized to 3” x 3” and the art designed as desired to print at that size, following proper safe zone guidelines. This is the same for any shape of cut.
For shapes such as circles, the cut path will touch all four sides of the artboard at the widest points, and any curves should be taken into consideration. Cut paths do not need to be included for standard shapes, but shapes must be considered while designing to ensure no artwork crosses the cut path.
Images
To ensure highest quality, please embed any linked files prior to exporting. Images should be at minimum 100 ppi at the desired dimensions.
Raster images cannot be printed on clear vinyl. If printing on clear vinyl, any images in the design should be converted to vector artwork.
Resizing Artwork During Upload
If the resize and skew to fit option is desired during the upload process, the aspect ratio between the current size, and the new desired size should stay the same. This option works best for 1:1 sizes such as perfect squares and circles, but can be used as long as the aspect ratio is maintained.
For example, if a 3” x 4” artwork is uploaded, resizing only maintains proportions as long as the dimensions are evenly scaled. This sizing should scale to 6” x 8”, 9” x 12”, or 12” x 16” and upwards following the same 3:4 aspect ratio.
QR Code Sizing
QR codes are not recommended below ¾” (.75”). If possible, please use our QR code generator for quality QR codes, trying to keep the quality at Good or better.
https://www.firesprint.com/qr-code-print-ready-generator-vector-svg.html
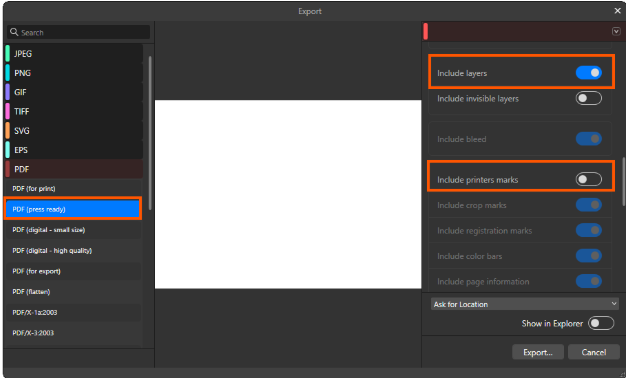
Exporting a File
When exporting a file, it is important to maintain the vector artwork and resolution.
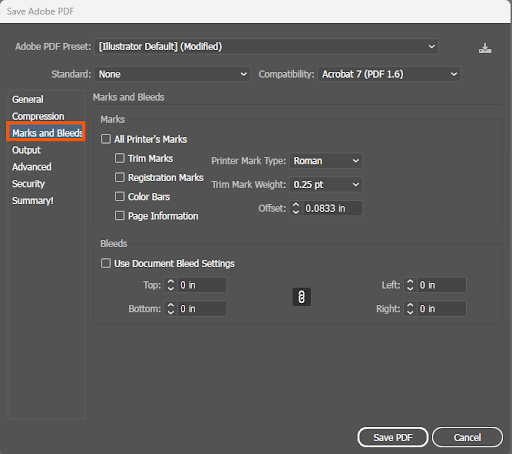
Bleed is automatically generated, and should not be included in the file.
See Bleed section for more information.
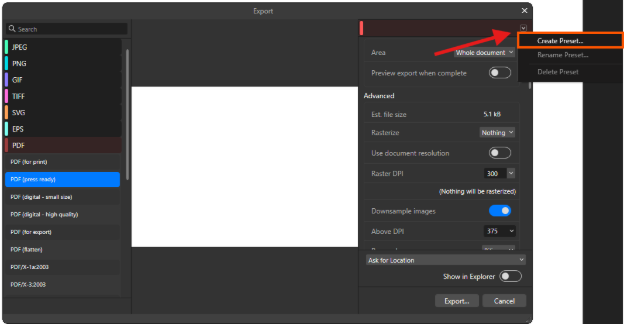
We recommend saving these settings as a preset in your desired program to avoid having to change them every time.
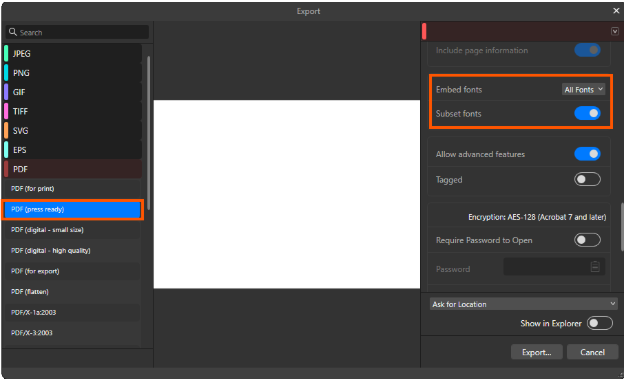
Illustrator
Please use the below settings to ensure that the file will export at the correct dimensions, and maintain layering and vector artwork. Any settings that are not pictured can be left as default

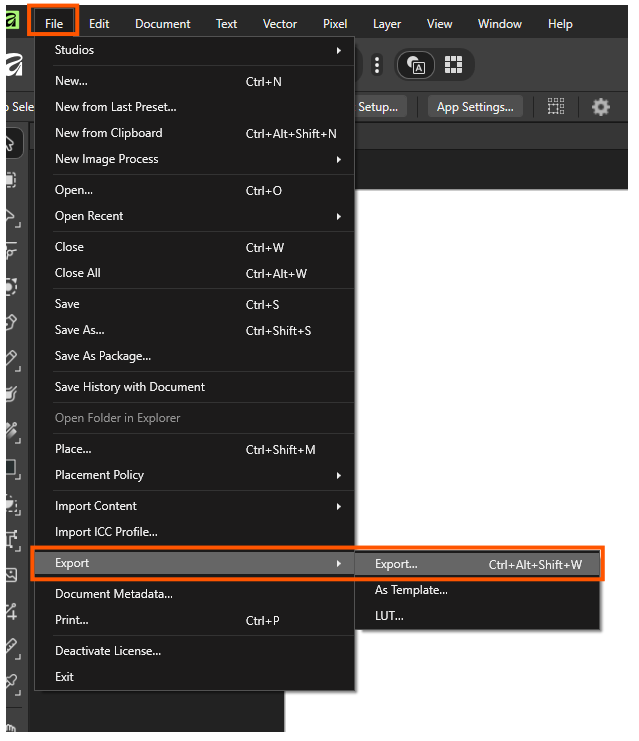
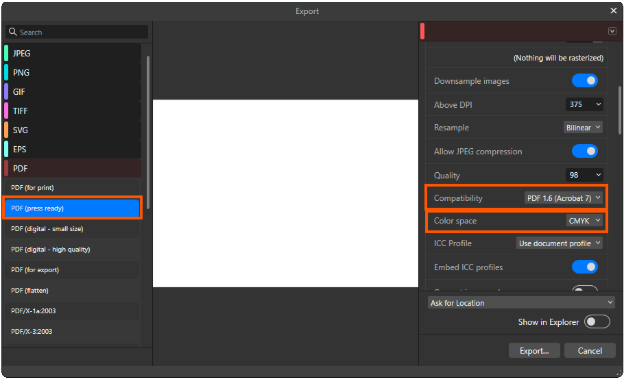
Affinity
Changing these settings will require scrolling down on the right side to find the correct options.

Minimums
What minimum requirements are needed for your design.
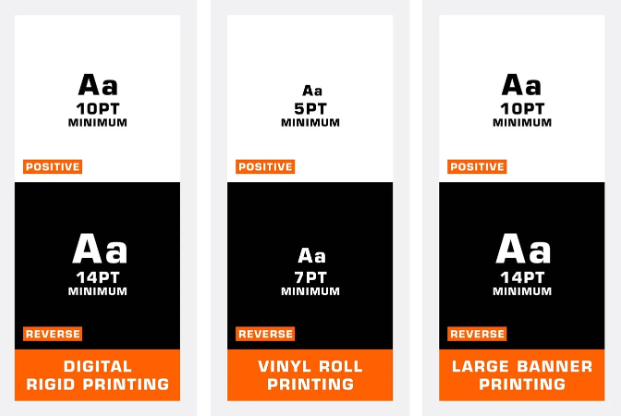
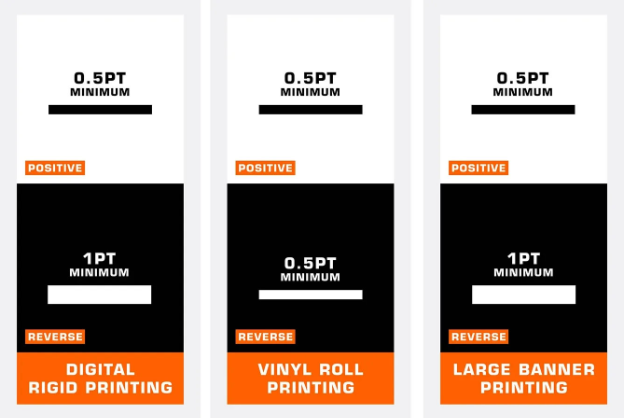
Digital Rigid Printing
Minimum font size of 10pt for positive (black on white) text, and 14 pt for reverse (white on black) text
Vinyl, Magnet, and Poster Printing
Minimum font size of 5pt for positive (black on white) text, and 7 pt for reverse (white on black) text
Large Format Banners
Minimum font size of 10pt for positive (black on white) text, and 14 pt for reverse (white on black) text
Standard placement uses 1" on center.

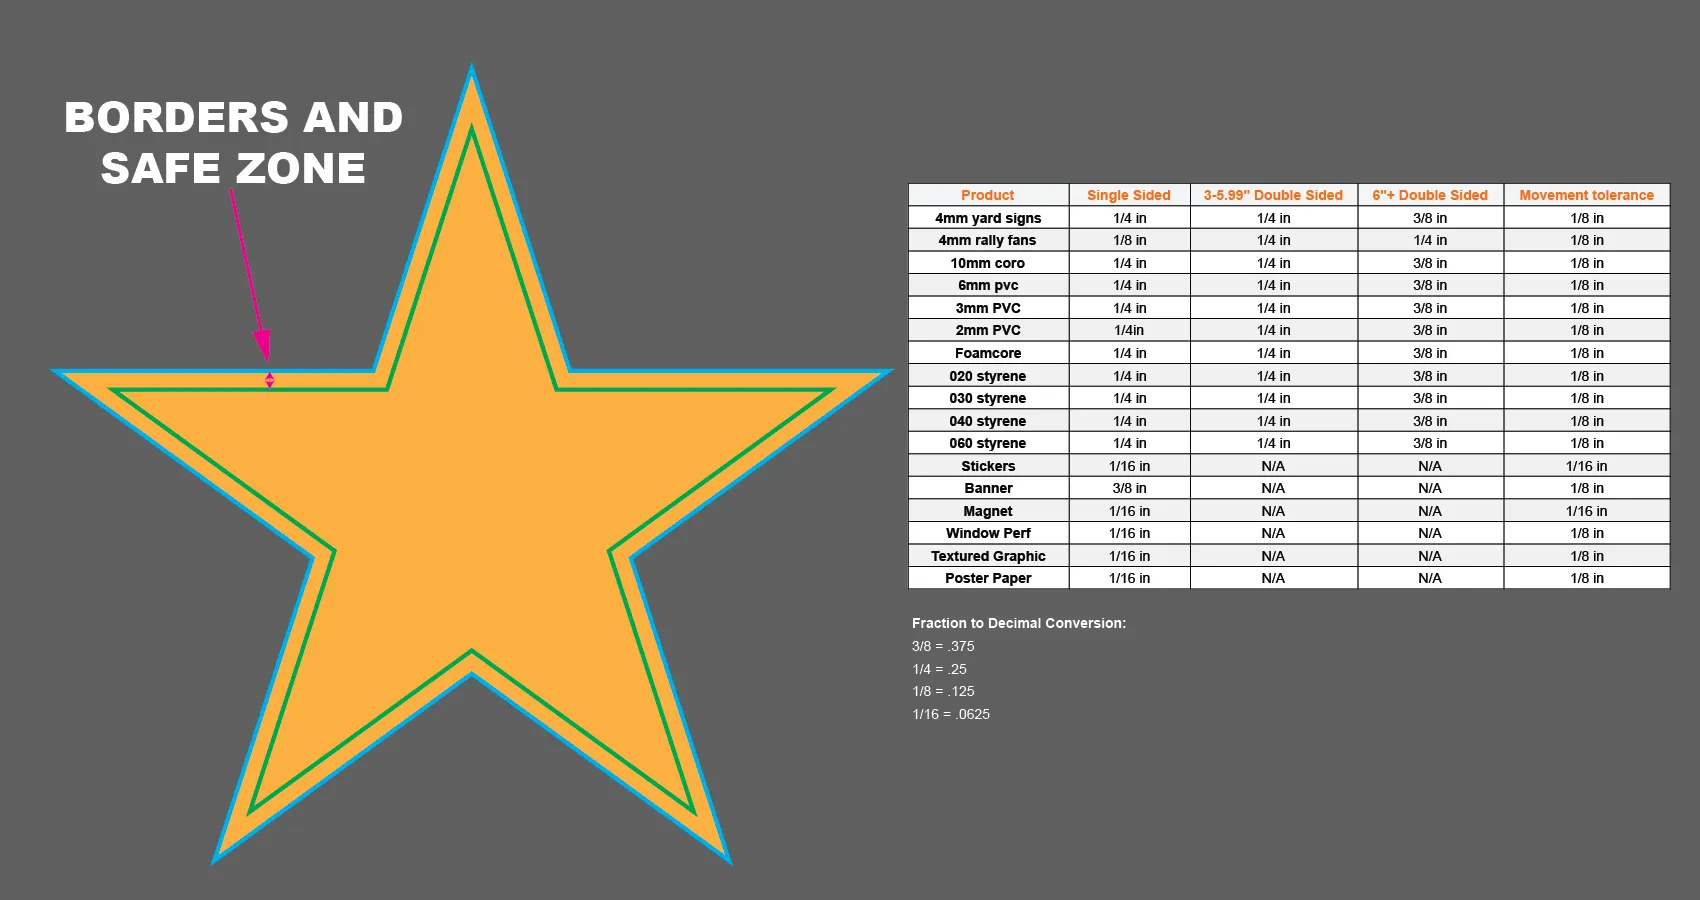
All information in this section applies to color or white borders around artwork, as well as the safe zone distance from the cut edge of the product to any part of the artwork not intended to be part of the bleed.
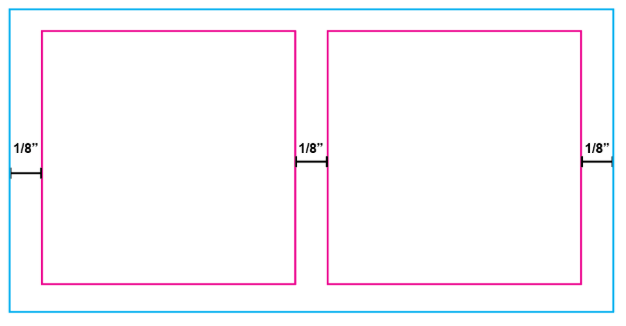
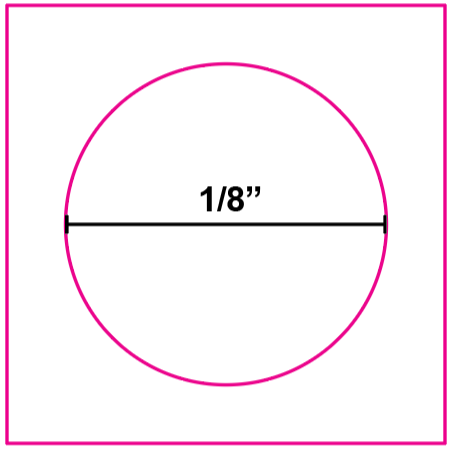
We recommend at least ⅛” of space between the individual cut lines, as well as the kiss cut lines and the edge of the product.
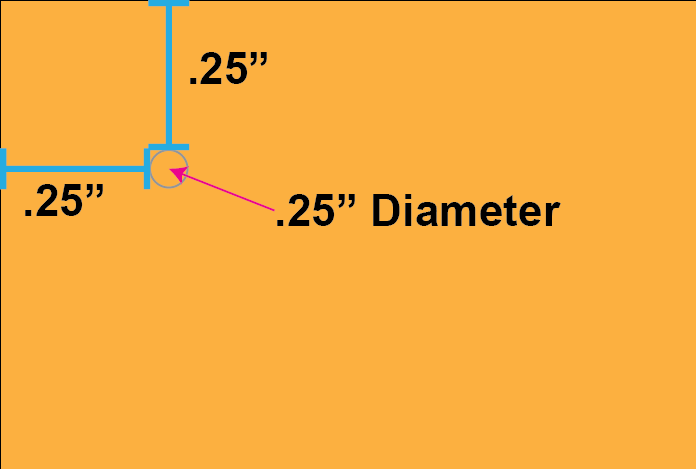
Cutouts, such as holes, are only allowed on kiss cut stickers and decals, and rigid materials. Die cut stickers and decals cannot have holes or inside cuts. Holes on kiss cut will not be die cut through the backer, but will be able to be weeded out of the vinyl.
- For kiss cut stickers, inside cutouts and holes should be no less than ⅛”, but ¼” is recommended.
- For Rigid materials, the minimum of any holes or cutouts should be no less than ¼”, but ½” is recommended.
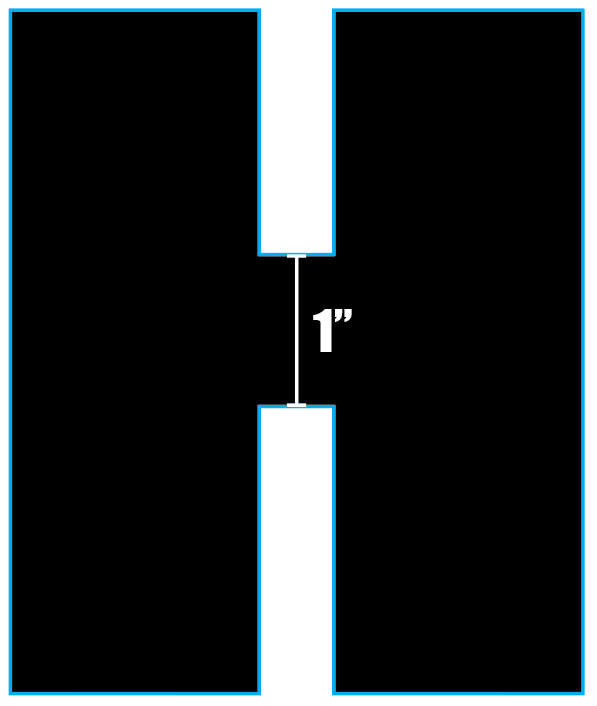
It is recommended that the space inside of each cut on rigid material leave no less than 1” of material remaining.
Bleed
Learn about how FireSprint uses bleed.
Auto-Generated Bleed
Bleed will be auto-generated for artwork that touches the edge of the sheet for all products. Do not include bleed in your file.
What If I have Bleed?
If uploading a file with bleed, you’ll need to crop when prompted to do so. The skew option tends to fit the bleed area into the ordered dimensions and can result in distorted or undersized artwork.
If possible, we recommend re-uploading the file without bleed.
Cut Paths
Learn about how FireSprint handles cut paths.
What Is a Cut Path?
A cut path is a 1pt vector stroke (color outline), that indicates where the product should be cut. This should be included on top of the artwork in the same file.
We recommend using either 100% Cyan or 100% Magenta for the cut path, as one of these stand out best from the artwork in most cases, but any color that clearly stands out and is not included in the artwork will work.
Kiss Cuts
We have a max number of 100 pieces per kiss cut decal. If you need more than 100 kiss cut pieces on a decal, please separate your designs into multiple jobs. This is due to the processing time when cutting and handling your artwork.
Art Sizing Guide (Cut Paths)
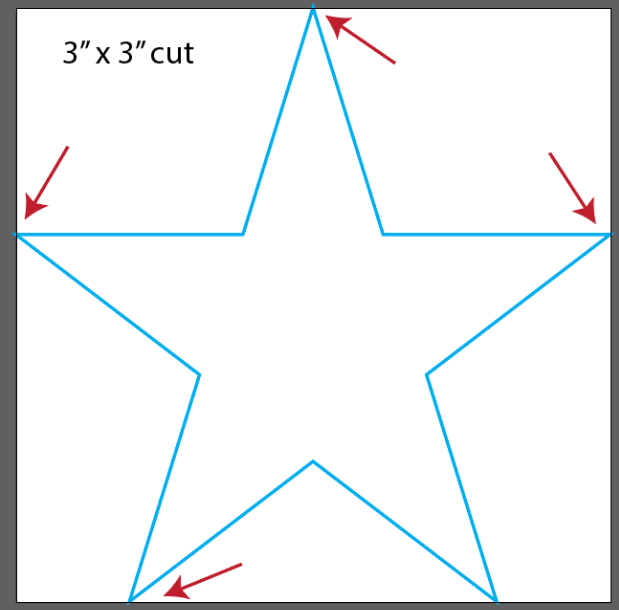
The desired cut shape and the artboard or sheet size should match in order to avoid any issues in the ordering process. Excess white space around the artwork, or included bleed can cause sizing issues in the upload process. If you know the sizing of the cut path, and there is excess white space around the artwork, the dimensions of the cut path should be ordered, and the Center option should be used in the upload process.
For example, if the custom cut path is a star shape, and it should be cut as a 3” x 3” shape, the points of the star should touch all four edges of the artboard or sheet at 3” x 3”.
Contour Cuts
- For contour cuts on substrates thicker than 1/8”, all inner corner radius cuts will require 3/8” or 0.375 radius.
- No contour cuts apply to 10mm Coroplast or 3/16” Foamboard.
- FireSprint reserves the right to simplify overly complex contour cut paths to maximize the quality of the final product.
- Proofs are required to be sent for approval for altered cut paths at no additional cost.
- Borders at the edge of double-sided signs must be 3/8” or thicker not including bleed.
Holographic and Clear Vinyl
Learn about how to setup your file for Holographic and Clear printing.
Holographic
There are two options when printing on holographic vinyl: CMYK + Spot White or CMYK. Follow the steps below to create your desired effect.
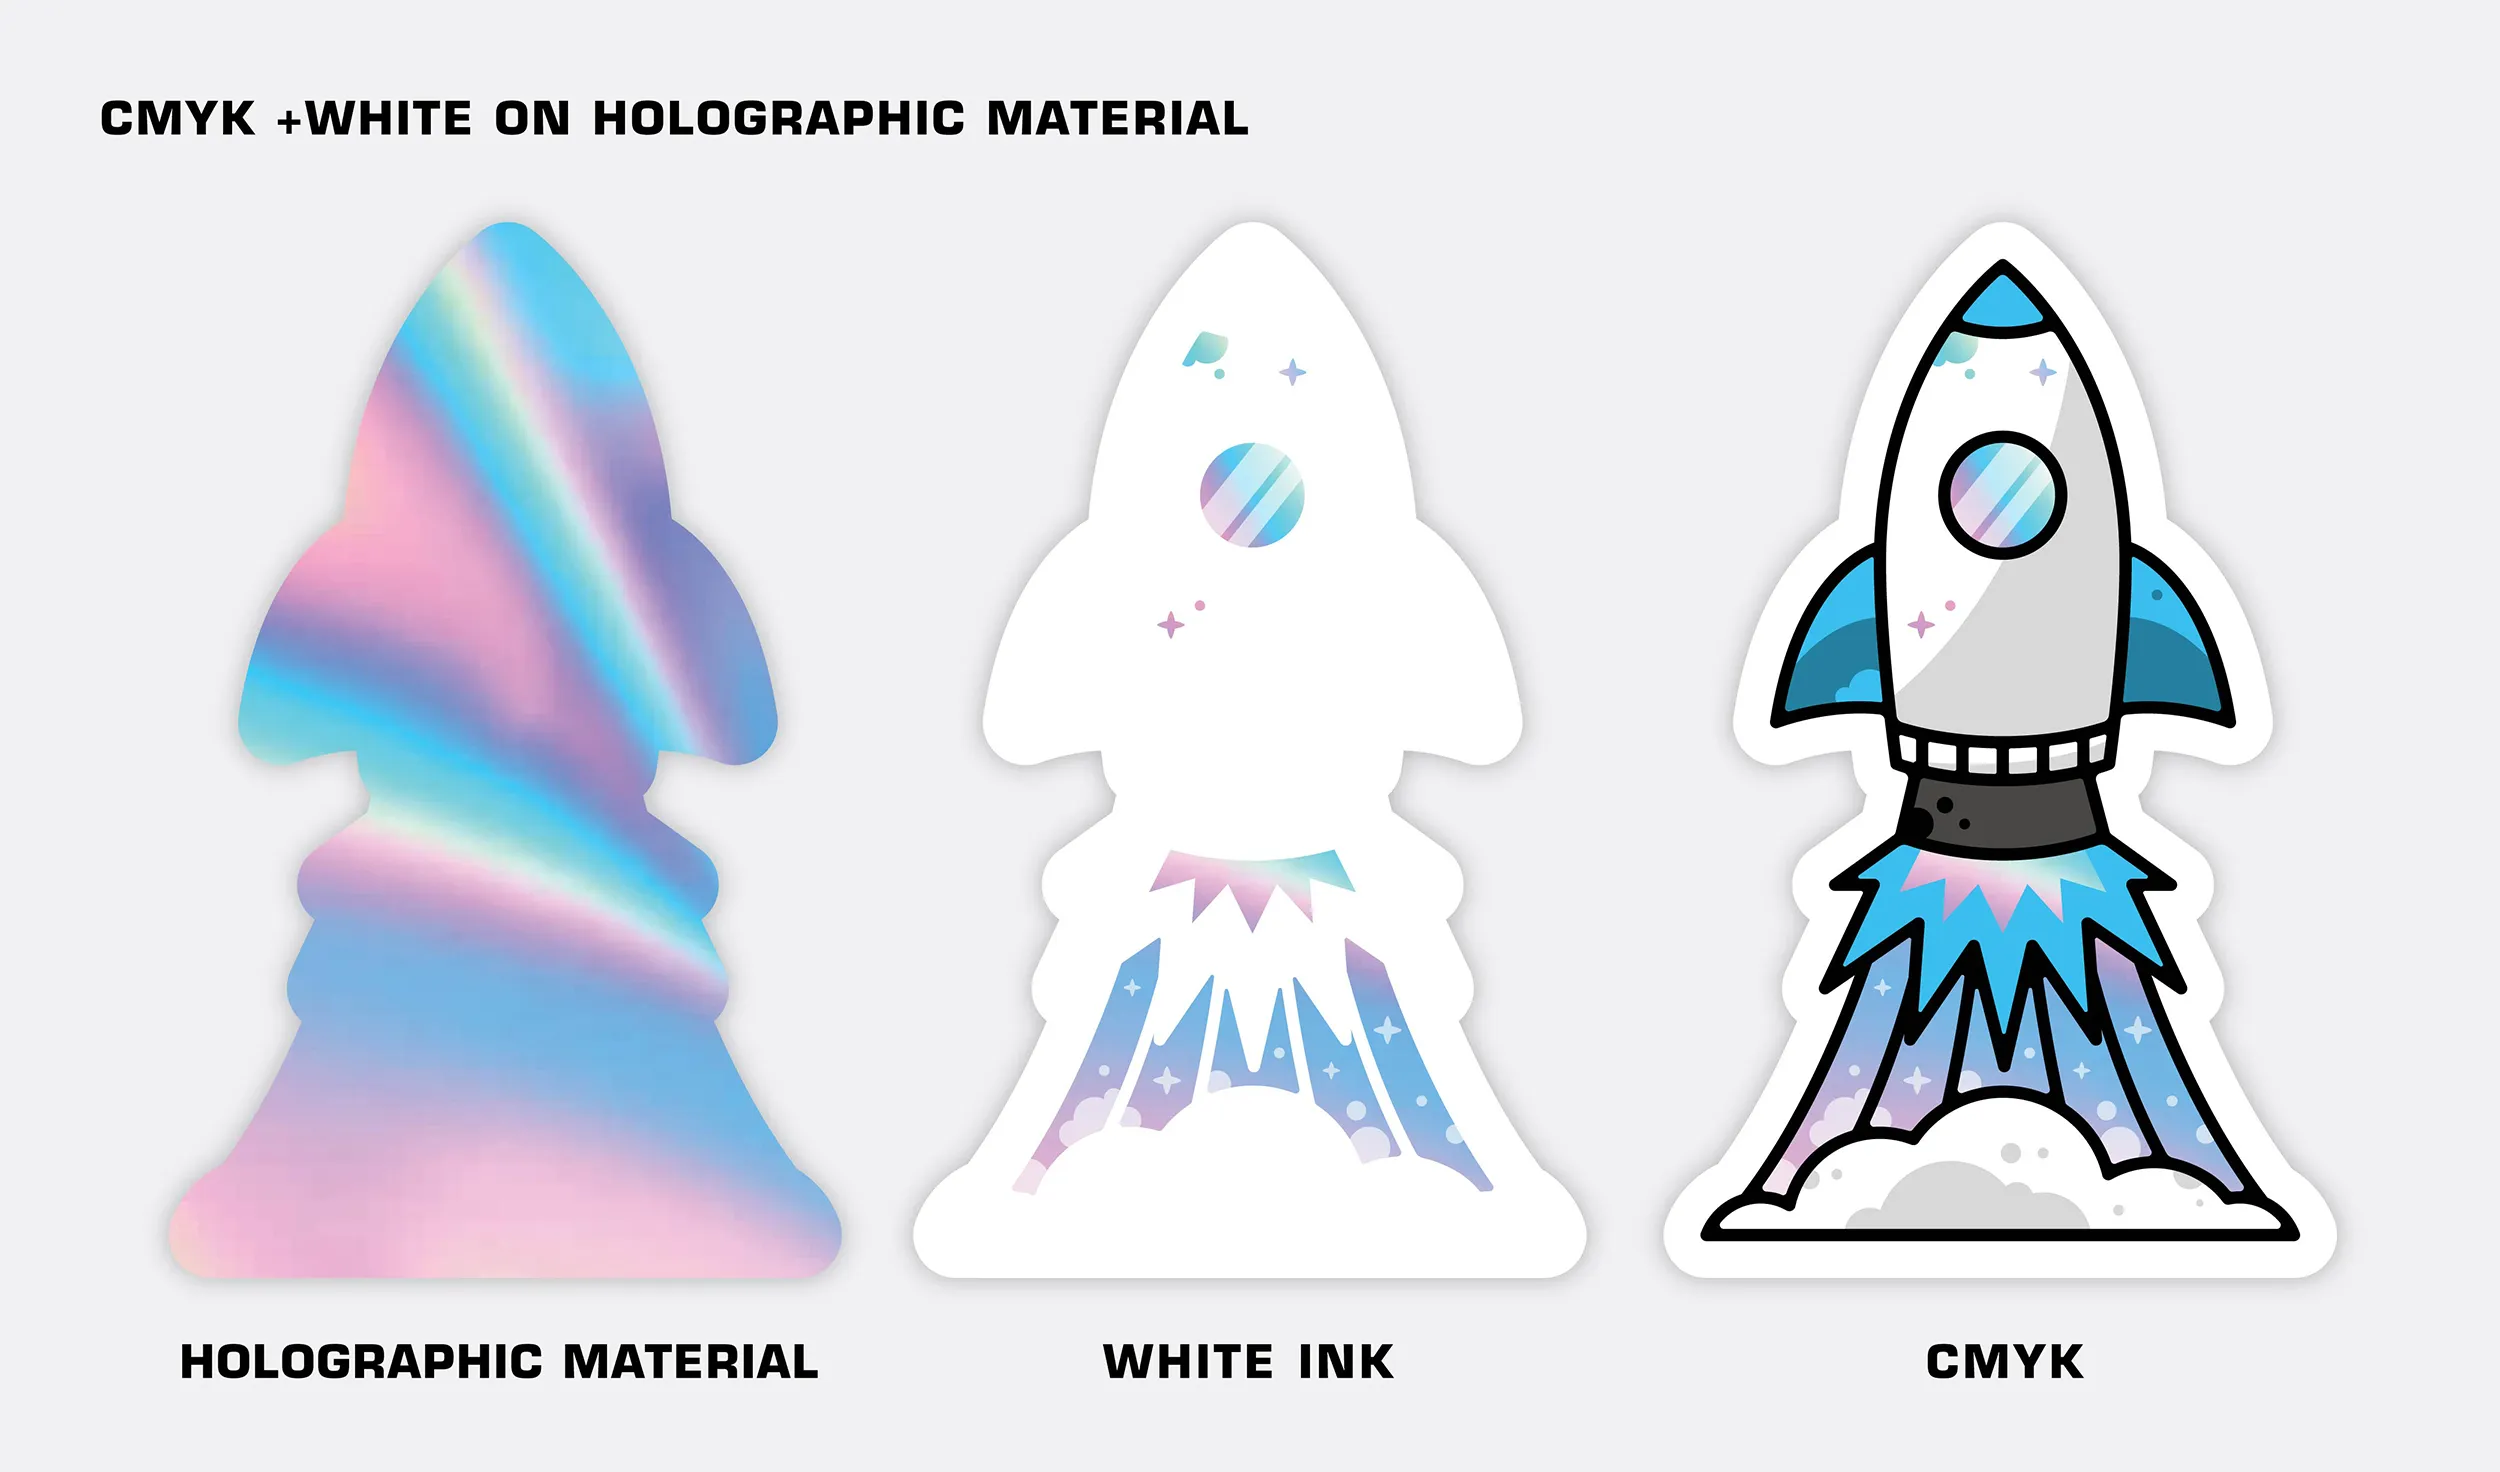
CMYK + Spot White Holographic Stickers
▎OVERVIEW
• If you’d like the color white to appear in your design choose CMYK + Spot White.
• The white layer is printed on the holographic material first, followed by the CMYK layer.
• Add a layer of white underneath any CMYK areas that you don’t want the holo effect to show through.
▎FILE SETUP FOR CMYK + Spot White
• Your file must include layers.
• Clearly label your white layer as “Spot White” and your CMYK layer as “CMYK”.
• Create a swatch named “Spot White”.
• Make sure the areas you want to print white are colored with that swatch.
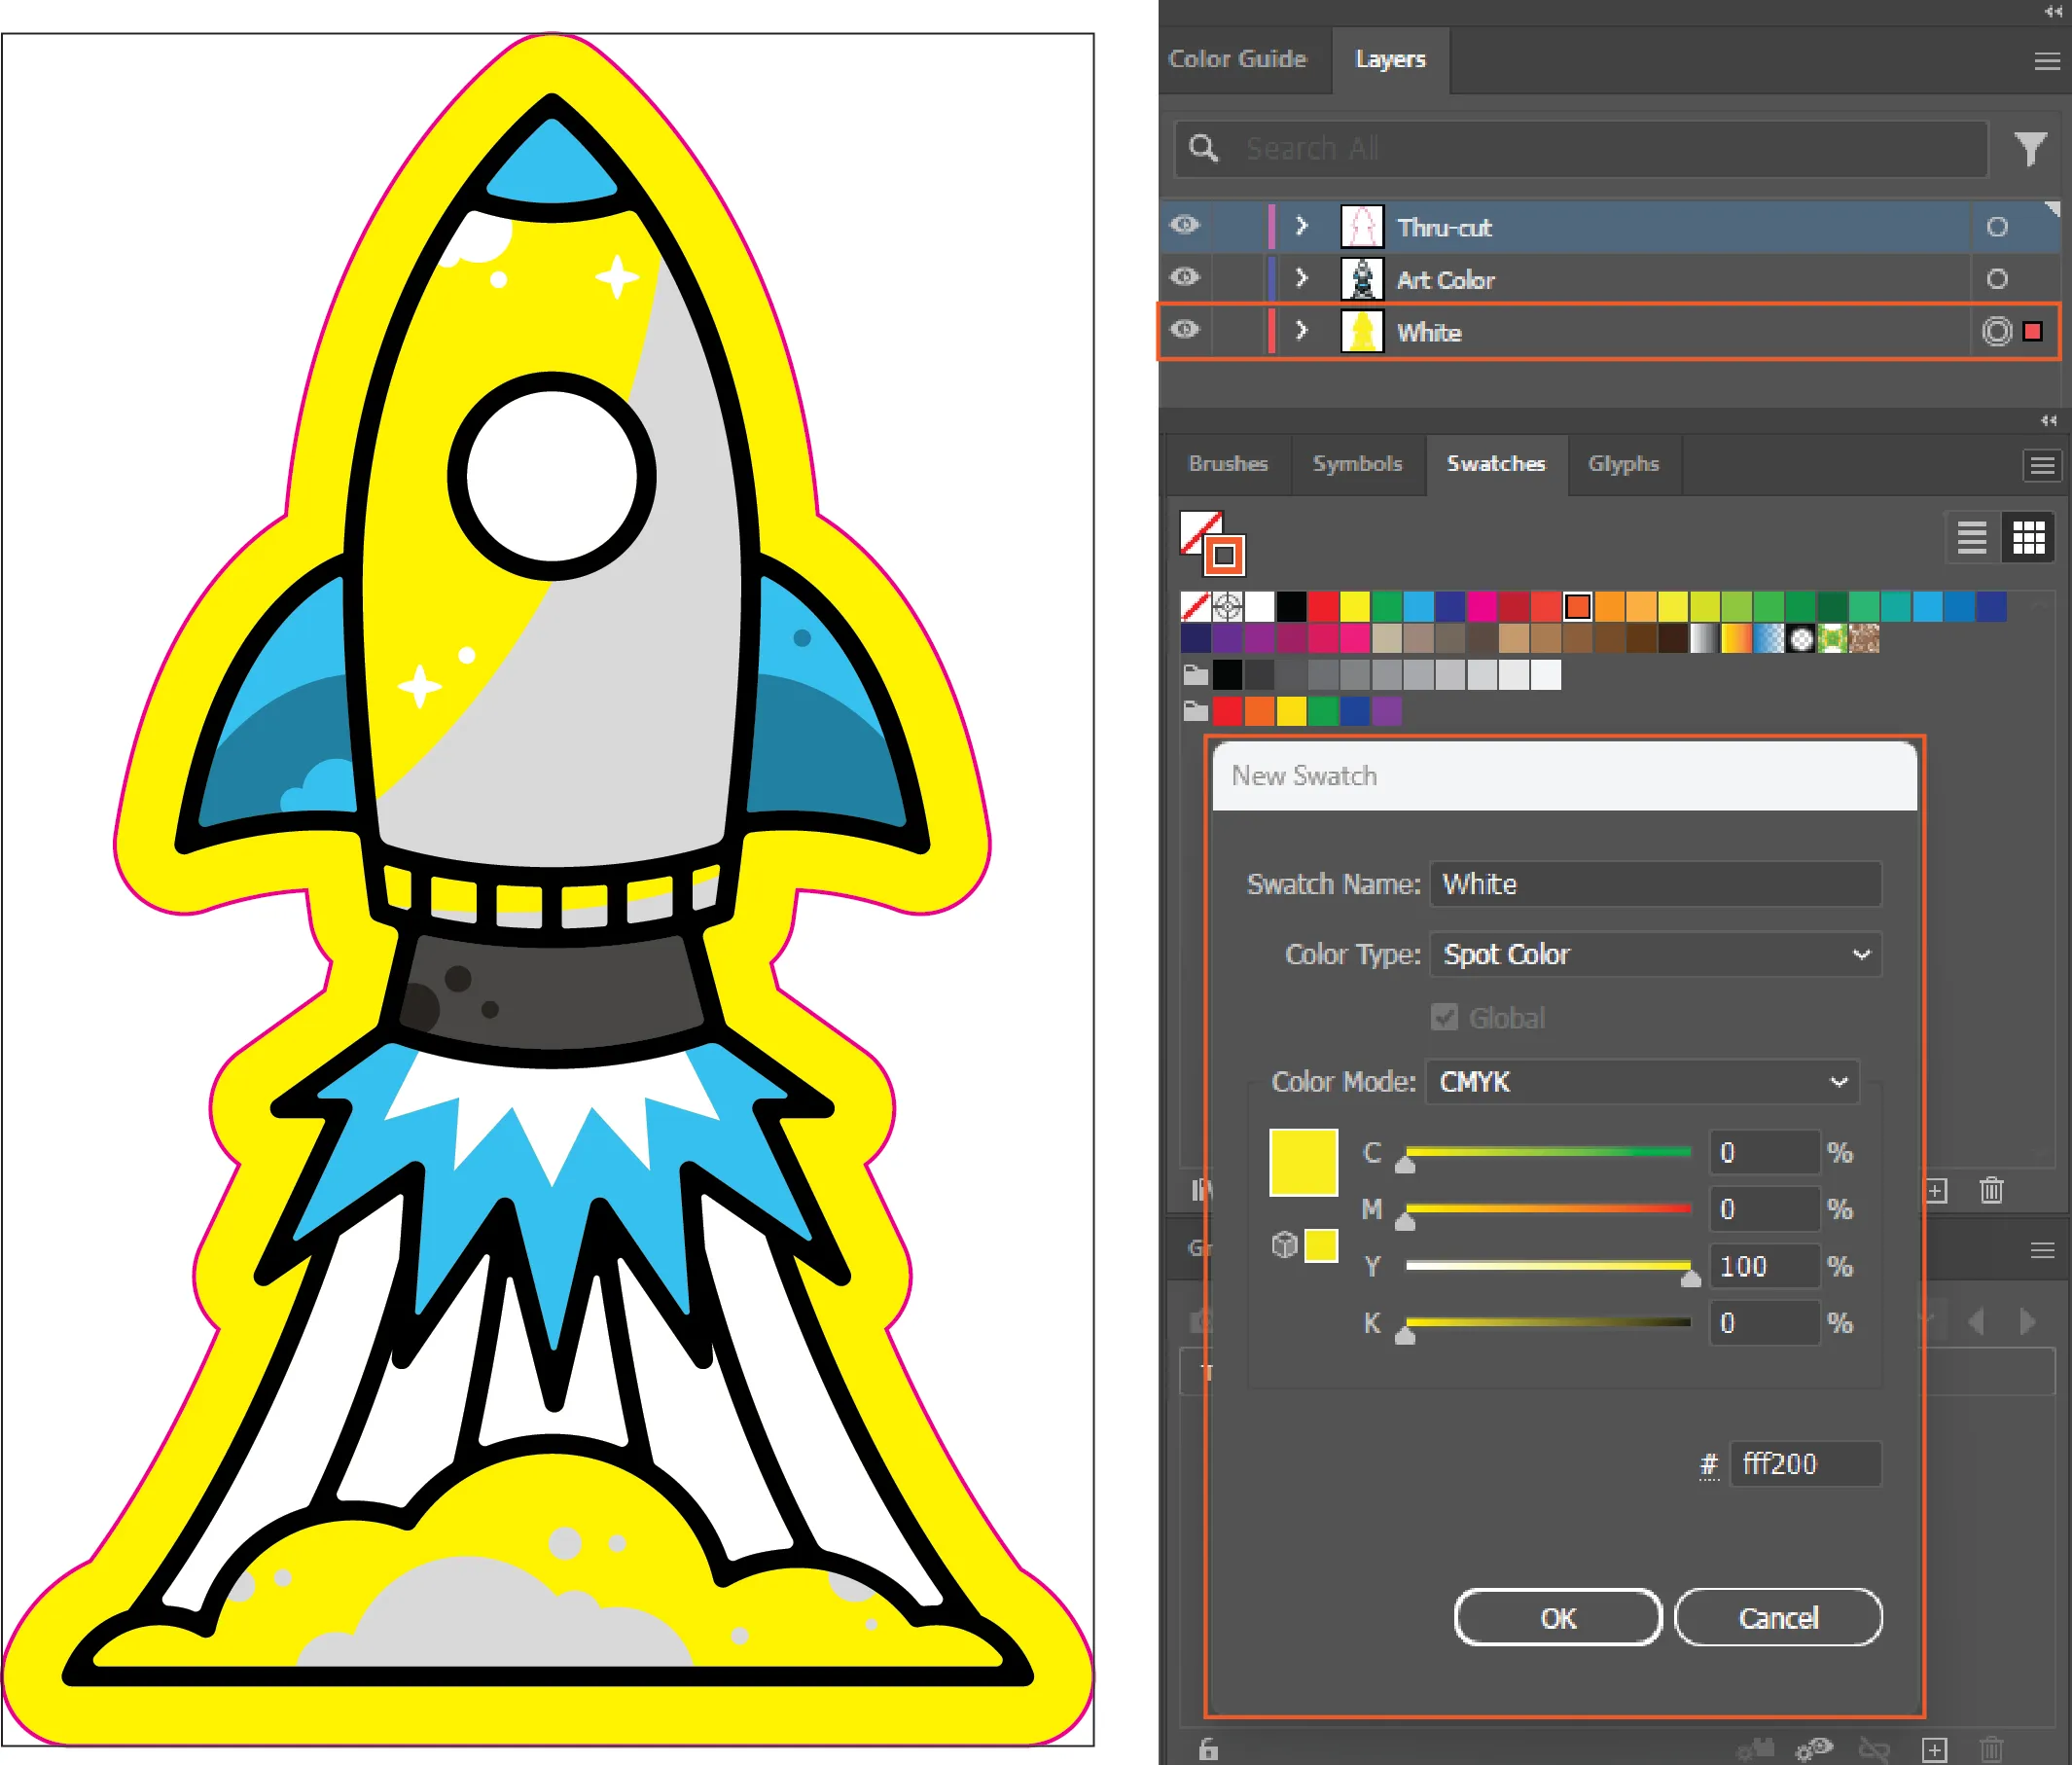
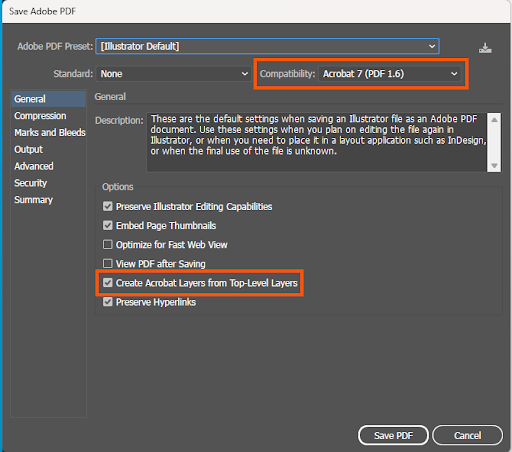
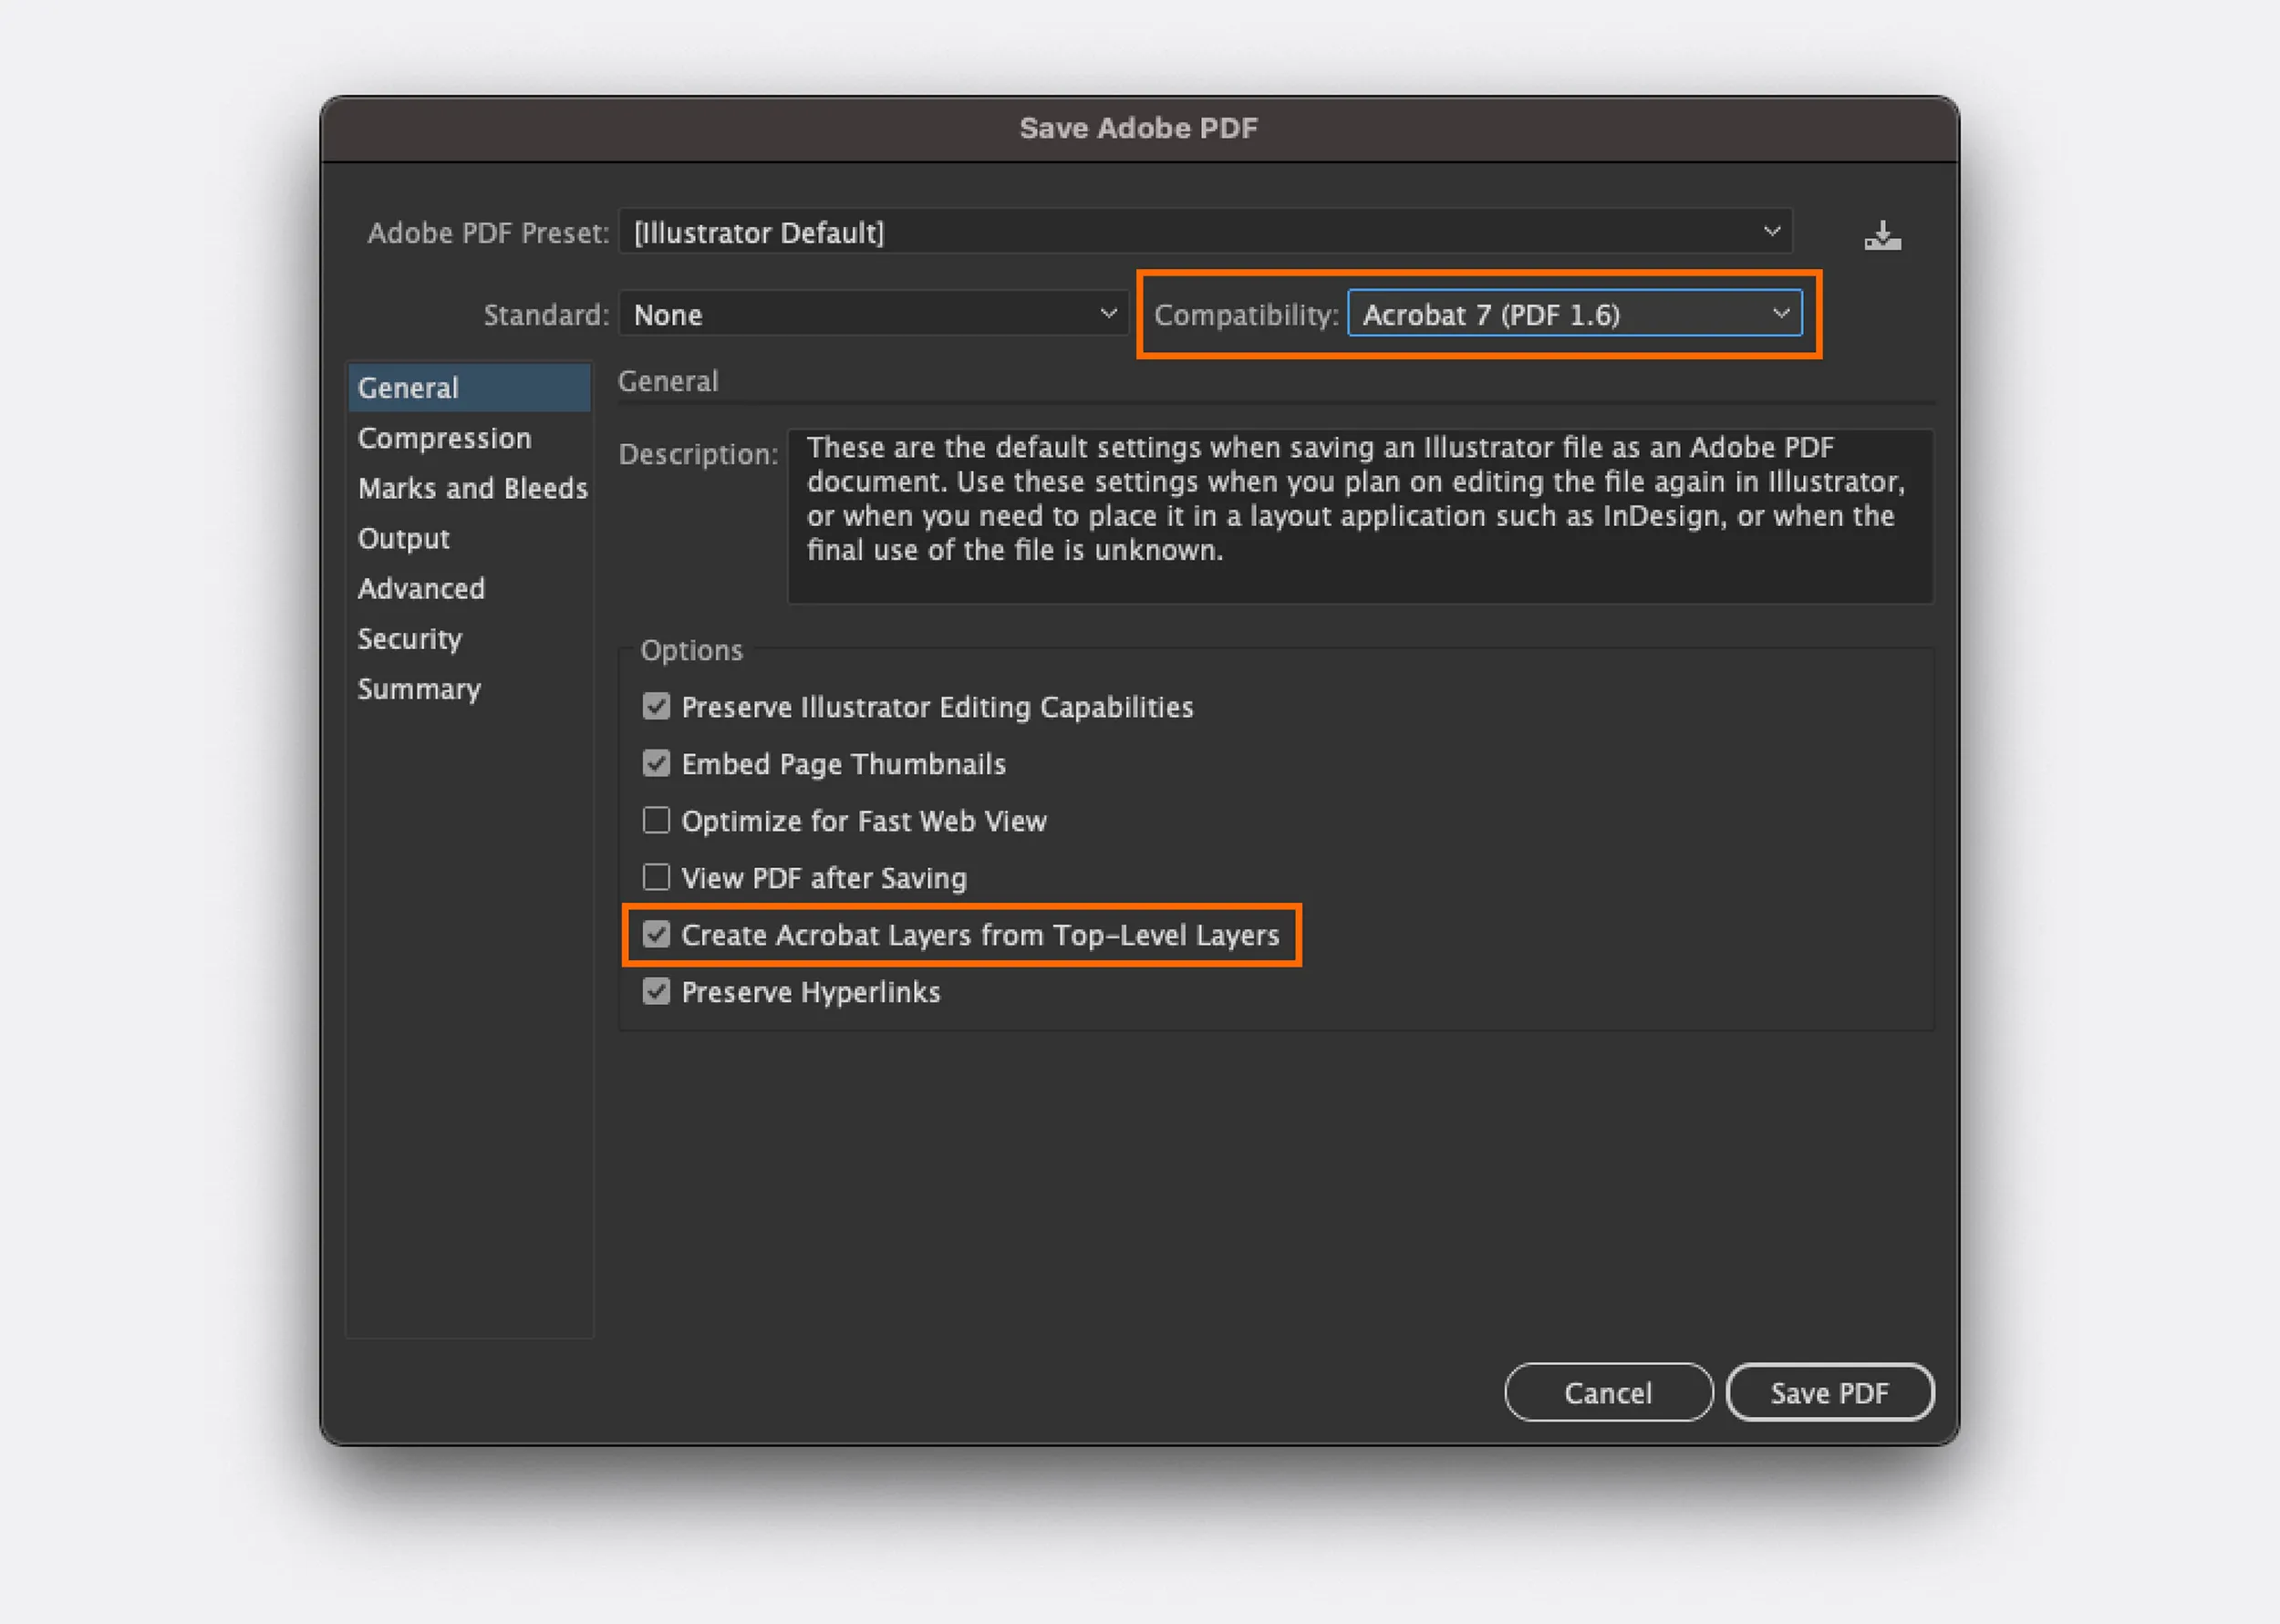
▎SAVING OUT YOUR FILE FOR CMYK + White
• Save your file as a PDF. No other file types are accepted.
• Choose Adobe 7 (or higher) compatibility when saving your PDF to preserve your layers.
• Under Options, make sure “Create Acrobat Layers from Top-Level Layers” is checked.
CMYK Only Holographic Stickers
▎OVERVIEW
• Printing CMYK only will yield no white in your design.
• Areas that would normally appear white due to paper color will appear holographic.
• The holographic effect will show through most colors and diminish with darker colors.
• Black or rich black areas of the design will have little to no holographic effect.
• Layers and spot color swatches are not needed for CMYK only printing.

Clear
▎VECTOR ONLYFor quality purposes, clear vinyl can only use vector artwork. Raster images result in unwanted pixels of white ink to print and cannot be used. Please vectorize all artwork prior to uploading on clear.

▎OPTIONS
There are three options when printing on clear vinyl: CMYK with White Underlayment, CMYK with White Underlayment + Spot White or Spot White Only
Follow the steps below to create your desired effect.
CMYK with White Underlyament Clear Stickers
▎OVERVIEW
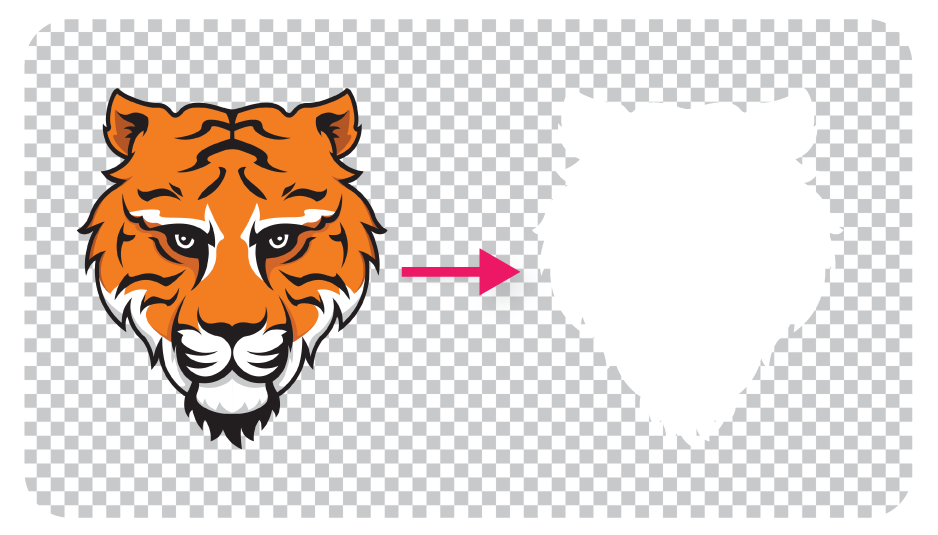
• White will only be printed under all colored pixels in the file, all white pixels in the file will be unprinted on the clear vinyl.
• The white layer is printed on the clear material first, followed by the CMYK layer on top of the white layer.
▎FILE SETUP FOR CMYK with White Underlayment
• No file setup is necessary, our printer will print white under every colored pixel in the file.
CMYK with White Underlayment + Spot White Clear Stickers
▎OVERVIEW
• White will be printed under all colored pixels in the file, in addition to any white specified in the spot white layer.
• The clear vinyl will be unprinted anywhere not defined in the spot white or CMYK layers.
• The white layer is printed on the clear material first, followed by the CMYK layer on top of the white layer.
▎FILE SETUP FOR CMYK with White Underlayment+ Spot White
• Your file must include layers.
• Clearly label your Spot White layer as “Spot White” and your CMYK layer as “CMYK”.
• Create a swatch named “Spot White”.
• Make sure the areas you want to print just white on the clear vinyl are colored with that swatch.
▎SAVING OUT YOUR FILE FOR CMYK + Spot White
• Save your file as a PDF. No other file types are accepted.
• Choose Adobe 7 (PDF 1.6) compatibility when saving your PDF to preserve your layers.
• Under Options, make sure “Create Acrobat Layers from Top-Level Layers” is checked.
Spot White Only
▎OVERVIEW
• Only white ink will print.
• No specific file set up necessary.
• Any vector objects in your file will be considered intended as white.
Variable Data
What we need for your variable data.
What is Variable Data?
Variable data will allow you to upload a single artwork and get more than 50 artworks set up on one single order, as long as the artwork meets the following criteria:
- None of the visual aspects of the artwork are changing, such as colors or images
- You need only the number or pieces of text to change
- The text is not changing font families, sizes, or colors
- The variable text does not change locations on the artwork
- The variable object is not a 2D barcode or image
Some examples of variable data orders include:
- Graduation Yard Signs
- Auction Paddles
- Parking Permit Stickers
Variable Data Options
▎NUMBER EACH SIGN
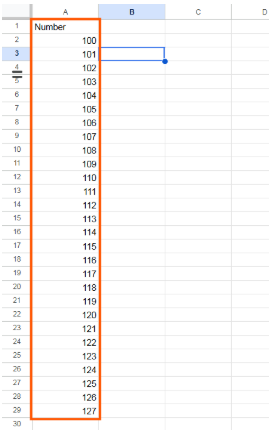
This is intended for consecutive numbering. There will be an option to enter your starting number, and we will use that number to set up a consecutive number sequence for the full quantity of the design.
If you want leading zeroes (01, 001, or 0001), please include those in your starting number.
To determine your total quantity, decide what range you would like (starting and ending numbers), subtract the starting number from the ending number, and add one.
Example:
Starting Number = 100
Ending Number = 200
200 - 100 = 100
100 + 1 = 101
Total quantity would be 101. This is because the starting number has to be included in the quantity as the first product. Otherwise the number range would be one short.
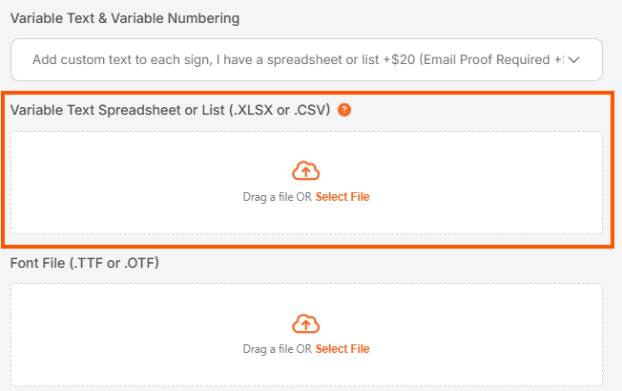
▎ADD CUSTOM TEXT TO EACH SIGN, I HAVE A SPREADSHEET…
This option should be used when:
- Names will be changing on the artwork, such as graduation signs
- You are using a non-consecutive number range
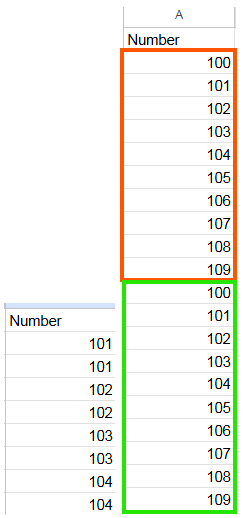
- You need multiples of each number in the range, such as 1,1,2,2,3,3…
This will require you to submit a custom spreadsheet with the correct information for the text.
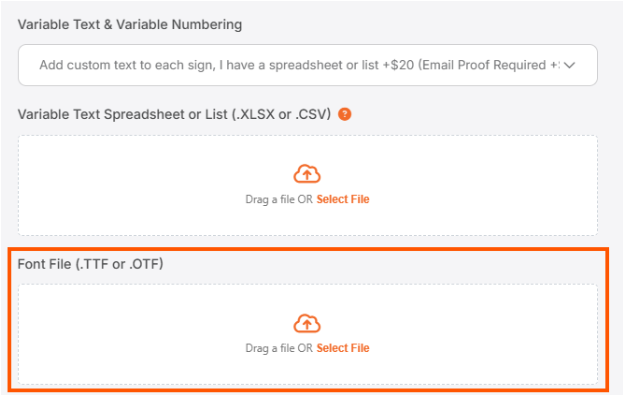
▎FONTS
We can use almost any font for your variable data. We ask that if possible, a font file (.otf or .ttf) file is provided. This will help us accurately set up the file using the exact font that you want.

Variable Data File Setup
How to setup for variable data
Text
Any areas of variable text should have a placeholder text set up to accurately and easily link spreadsheet data to the desired portion of the artwork.
For signs with names, it is best practice to set up the font size so that the longest name or piece of information fits within the space provided in the artwork. This will ensure that all names will fit into that space without modification.
The variable portions of the text should be left as live, editable text. This allows us to more easily see what font goes in what portion of the text. Anything static, or unchanging, can be converted to outlines.

Spreadsheet
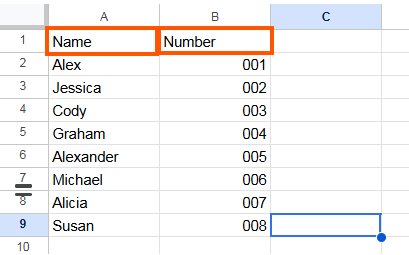
To reduce the chances of delays or mistakes in the setup of variable data, please ensure that every text line that should change has its own column, and there is one row per name or number desired. The column should have a header that indicates what the data represents. For accuracy, particularly where names and numbers may both be in signs, the header can match or describe the placeholder text, but should not be one of the pieces of data.
Multiple Points of Variable Data
We can have as many areas of the variable data change as you would like, as long as there is no more than one row of data for each sign/sticker/paddle. One column can be linked to multiple text boxes, or multiple text boxes can be linked to different columns.
▎ONE COLUMN, MULTIPLE INSTANCES
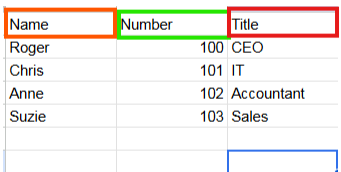
▎MULTIPLE COLUMNS, ONE INSTANCE

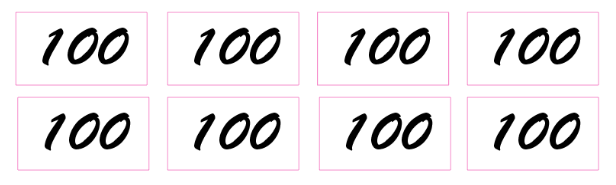
▎MULTIPLES OF ONE SEQUENCE
Exported Spreadsheet
When exporting the spreadsheet to upload, please save it as either .XLSX or .CSV format
